Interactive Tutorials in VSCode

Software Engineer
1. Introduction
Visual Studio Code (VS Code) offers a powerful feature called Walkthroughs that allows extension developers to create step-by-step guided experiences directly within the editor. These are invaluable for onboarding new users, guiding them through setup processes, or demonstrating complex features. A walkthrough is essentially a curated list of steps, often involving user interaction like running commands or opening files, designed to achieve a specific goal.
In this article, we will be exploring a walkthrough designed to guide new users into setting up an opam development environment on their computers. This particular walkthrough aims to simplify the OCaml and opam installation and initialisation process for users across different operating systems.
2. Defining a new Walkthrough
The core of any VSCode walkthrough is its JSON definition. This is done in the package.json file of the extension plugin. Below is an extract from our walkthrough code with explanations of the key fields used:
"contributes": {
"walkthroughs": [
{
"id": "ocaml-onboarding",
"title": "OCaml: Setup opam dev environment (manual)",
"description": "A guided, terminal-based installation of OCaml and essential tools with the opam package manager.",
"steps": [
{
"id": "install-opam-windows",
"when": "isWindows",
"title": "Install opam",
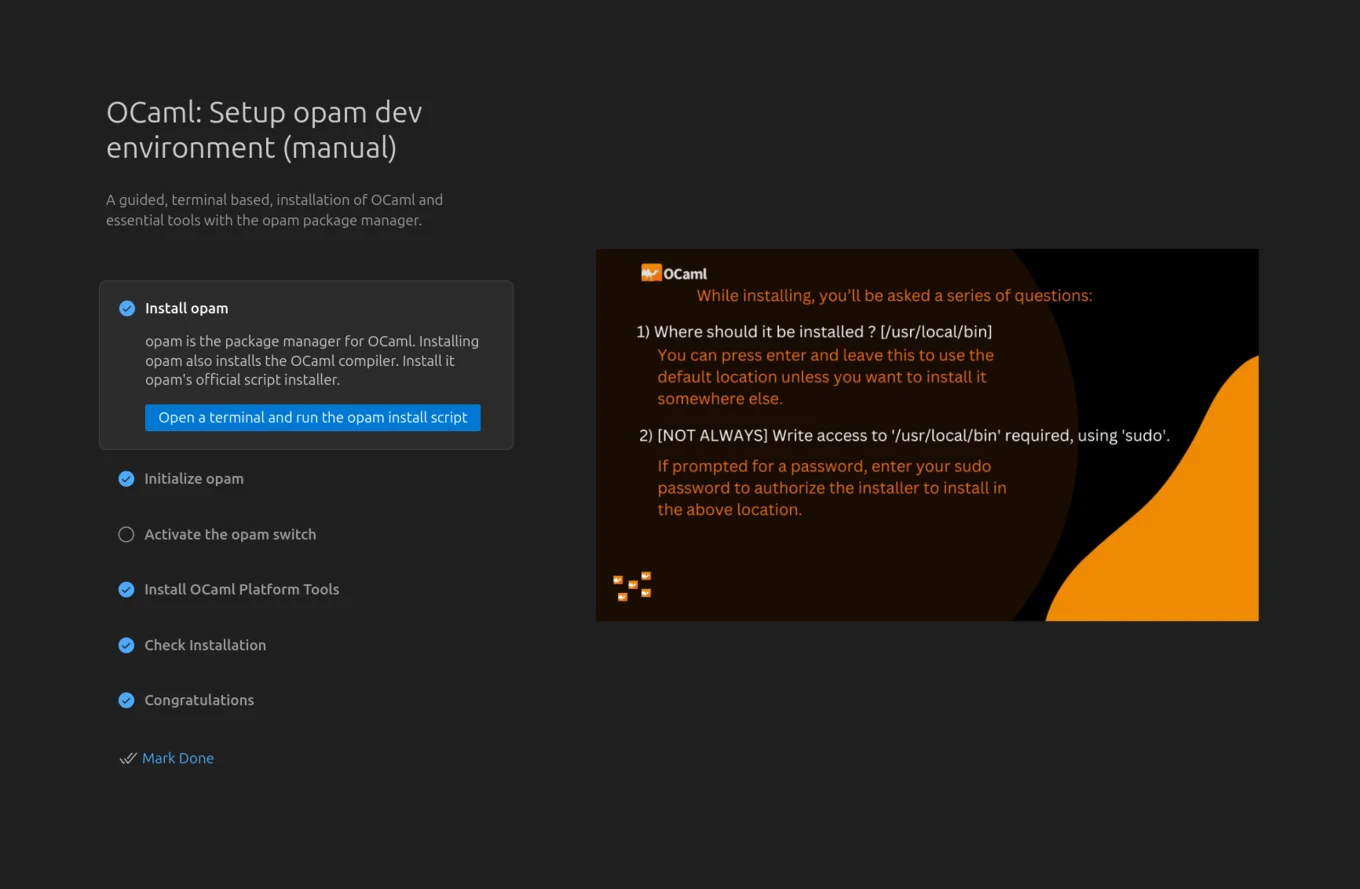
"description": "opam is...On Windows 10 or 11, install it using Winget:\n\nRun `winget install Git.Git OCaml.opam` in PowerShell.\n\n[Open a terminal and run winget](command:ocaml.install-opam)",
"media": {
"image": "assets/opam_install.jpg",
"altText": "While installing opam...."
},
"completionEvents": [
"onCommand:ocaml.install-opam"
]
},
...
]
}
]
}
3. Understanding the Fields
Let’s break down each field used in the walkthroughs and steps definitions:
📌 id
- Purpose: Uniquely identifies the walkthrough or step.
- Example:
"id": "ocaml-onboarding"for the walkthrough, and"id": "install-opam-windows"for a specific step. - Why It Matters: This ID can be referenced elsewhere in the extension for activation events or linking between steps.
📌 title
- Purpose: The display title of the walkthrough or step, visible to the user in the UI.
- Example:
"title": "Install opam"or"title": "Congratulations". - Why It Matters: Titles are user-facing and help orient the user on what the current or upcoming task is.
📌 description
-
Purpose: A longer text description that explains what the user is expected to do or learn.
-
Example:
"description": "opam is the package manager for OCaml.
Installing opam also installs the OCaml compiler.
Install it opam's official script installer.\n\n[Open a terminal and run the opam install script](command:ocaml.install-opam)"
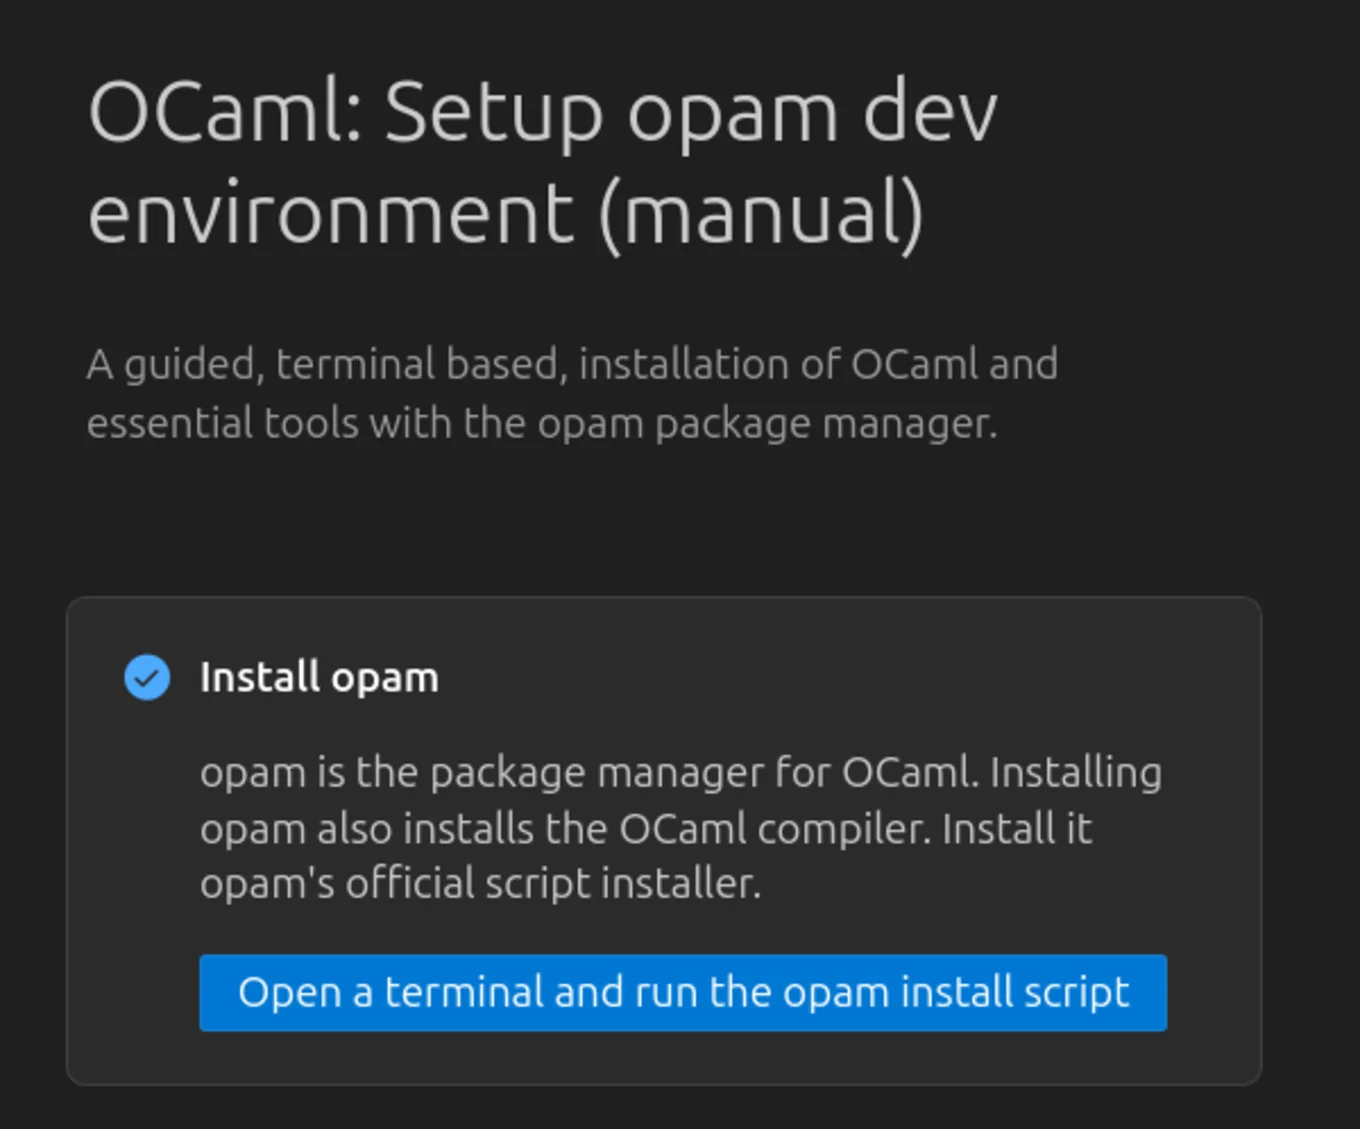
- Why It Matters: Supports markdown-like syntax for command links, terminal instructions, and formatting. Clear instructions improve user success rates.
📌 media
-
Purpose: Provides a visual aid for the step to help users better understand or visualise what to expect.
-
Structure:
"media": { "image": "assets/opam_install.jpg", "altText": "Screenshot while installing opam..." } -
Why It Matters: Helpful for users unfamiliar with the terminal or new to development tools. Alt text improves accessibility.
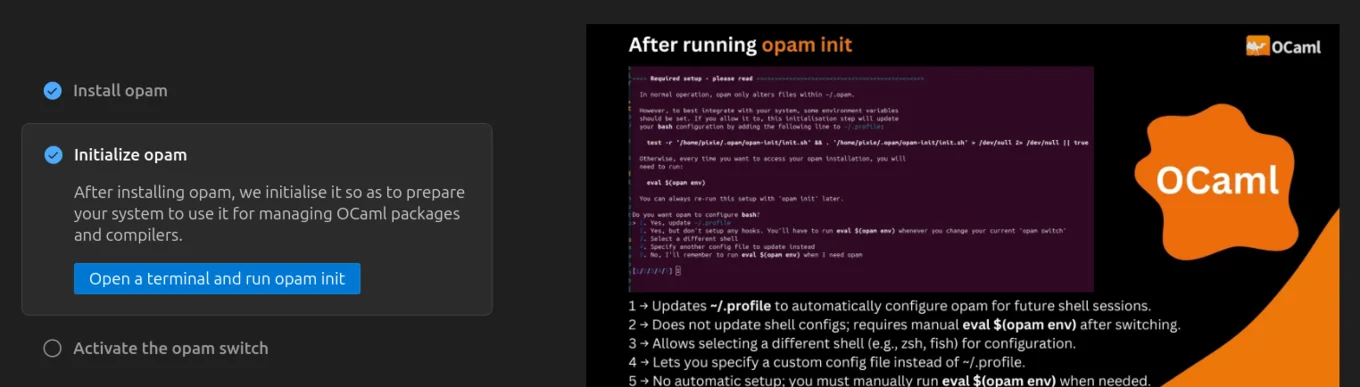
📌 completionEvents
-
Purpose: Defines what user action marks the step as complete.
-
Examples:
"onCommand:ocaml.install-opam"— Completes when a specific command is run."onLink:https://docs.google.com/forms/..."— Completes when the user clicks a specific link.
-
Why It Matters: It helps VS Code track progress and visually mark steps as complete, making walkthroughs interactive rather than static.
📌 when
- Purpose: A condition determining whether the step should be shown based on the user's environment.
- Example:
"when": "isWindows"— This step only appears if the user is on a Windows machine. - Why It Matters: It ensures users only see relevant instructions for their operating system, toolchain, or context.
3. Why Use Walkthroughs?
Walkthroughs can dramatically improve the first-time user experience. For the OCaml VSCode platform, this onboarding experience simplifies the typically complex and OS-specific steps of installing opam, initialising the environment, and setting up an OCaml development toolchain.
Moreover, Walkthroughs:
- Reduce support burden by giving structured guidance.
- Can react to user actions in real-time (e.g., via
completionEvents). - Offer a much smoother onboarding than traditional documentation.
- Work offline and are available immediately after installation.
4. Resources
Open-Source Development
Tarides champions open-source development. We create and maintain key features of the OCaml language in collaboration with the OCaml community. To learn more about how you can support our open-source work, discover our page on GitHub.
Explore Commercial Opportunities
We are always happy to discuss commercial opportunities around OCaml. We provide core services, including training, tailor-made tools, and secure solutions. Tarides can help your teams realise their vision
Stay Updated on OCaml and MirageOS!
Subscribe to our mailing list to receive the latest news from Tarides.
By signing up, you agree to receive emails from Tarides. You can unsubscribe at any time.